
Cottage Bathroom Rejuvenation | Part 1
I was recently approached to help assist with a bathroom renovation for a home on an acreage outside of the city. These clients are still very much in the exploring phase of the project and aren’t sure when or if they’ll even get started, but wanted some advice on how they could elevate the space should they choose to move forward.
One of the biggest challenges with this project is that the layout is firm and the majority of the materials (flooring, countertops, and cabinets) are already determined. At first glance, having so much of the ‘fun’ aspects of a project pre-determined may make providing further assistance seem a bit pointless. After all, if all the major items have been chosen, what do you need me for?
But the more I thought about it, the more I felt that it’s pretty common for people embarking on a renovation to have similar limitations. How often have you heard someone mention they want to update their kitchen backsplash, but don’t want to change their cabinets or counter tops? Or maybe it’s the bathroom countertops that are being replaced, but everything else is staying the same. Basically, more often then not, I think people are often having to work around existing finishes and materials as opposed to starting with a clean slate.
So while I’m not sure where this project will end up, I thought it would be worth adding it to my portfolio and use it as an opportunity to not only give some insight into how I think through design problems, but also demonstrate how you can really elevate a space from just being a simple material swap.
Overall Design & Design Restraints
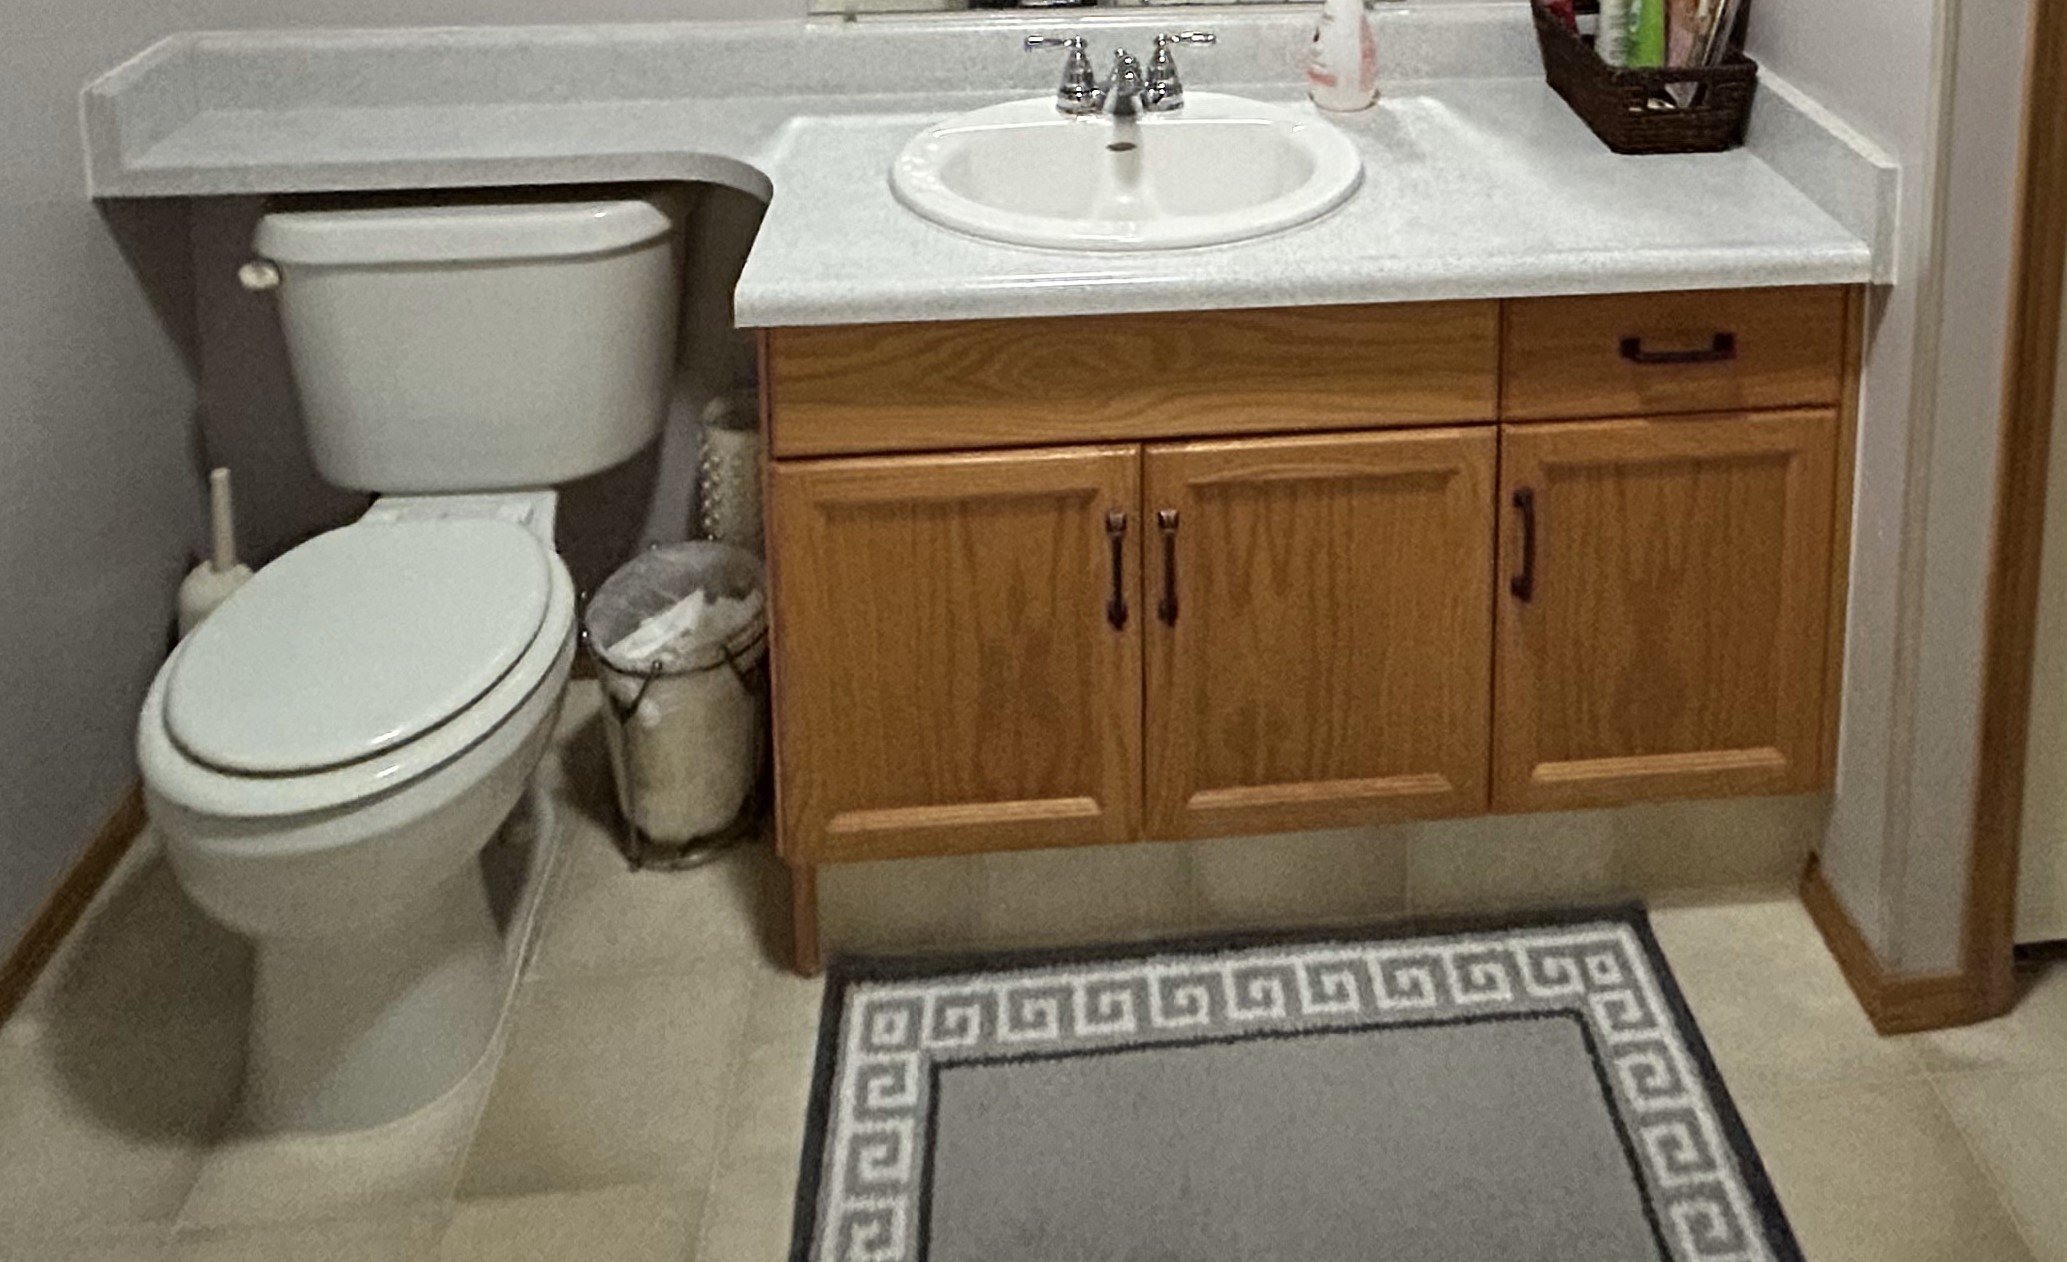
I’ll start with the existing floor plan. As you can see, it’s a good sized bathroom with a nice amount of storage. Since the space functions so well, we aren’t going to move any walls or adjust the plumbing and electrical. That said, the bi-fold closet door does date the space a bit so I think it’s worth looking at making some changes there to help this bathroom feel more current.

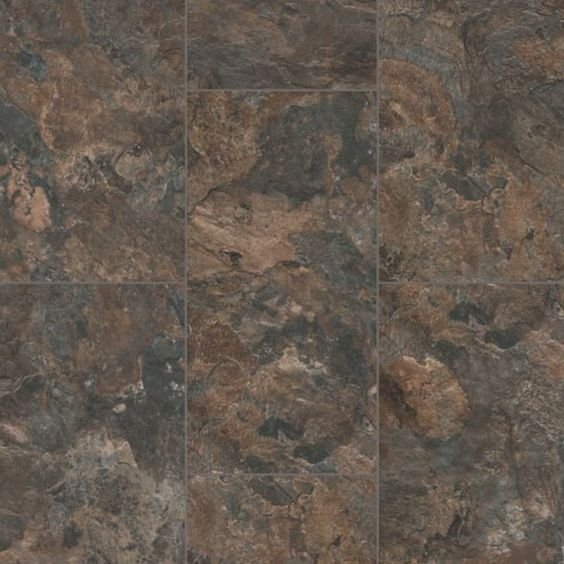
And here are samples of the flooring and granite countertops that have already been purchased, as well as a photo of the honey oak vanity that we’ll be working with. It’s also worth noting that the tub/shower will likely be pre-fab as opposed to tiled.

Finally, we need to take into consideration is the of rest of the home, which tends to lean more traditional. We’ll want to ensure that this space, once completed, feels cohesive with the rest of the house.
What Can We Do?
With so much of the design elements already determined, the first thing I did was go through the space, taking in every detail, so that I could identify where we could still make changes. I’ve already mentioned the bi-fold door, but I also don’t love how the toe kick under the vanity cabinet has been finished. The walls haven’t been painted in nearly 20 years, so we could look at those as well. The baseboards and door trims could also be swapped out for something that feels a bit more current, as well as the plumbing fixtures, cabinet hardware, towel bars, lighting, and vanity mirror. Finally, while a pre-fab tub/shower is certainly more economical and easy to install, it doesn’t have the same impact as a wall tile so I wanted to look at enhancing the shower space so that it still feels upgraded despite the plastic walls.
So despite feeling limited at first, I now have a pretty lofty list of items to look into:
Update bi-fold door.
Update vanity toe-kick.
Look into wall treatment options.
Update baseboards & trims.
Source new plumbing fixtures.
Source new hardware.
Source new lighting.
Source new mirror.
Look into how to enhance the shower.
Inspiration
Next up was finding some ideas and inspiration. Honestly, as soon as these clients reached out to me about this bathroom my mind immediately went to wainscoting. It’s a lovely way to enhance a small space and I thought it would tie in beautifully with the country feel of this home. What I also love about wainscoting is that it’s timeless yet can easily be updated every few years to remain current by changing the colour or incorporating wall paper.
Here are a few of my favorite ideas, ranging from Craftsman-esque, to modern yet moody, to soft and feminine.

Moving on to finding a solution for the pre-fab tub/shower.
Often (but not always) it’s ideal for whatever material used on a shower wall would run up to the ceiling. This helps not only makes the enclosed space feel taller, it looks more luxurious. Unfortunately, most pre-fab tub/showers are 84” tall and standard ceiling height is 96”. In fairness, this does leave some space for a row of tiles along the top of the walls, but even if you ran those tiles to the ceiling, the plastic/tile combo isn’t going to have the same high-end feel as one material running continuously to the ceiling. So the challenge is how do we enhance a pre-fab shower?
After a bit of research, framing in the shower started to seem like a great solution. With the current shower being recessed into an alcove, it would be simple enough to incorporate into this space, and if the bottom of the bulkhead lined up with the top of the pre-fab shower walls, it would help make those short walls feel more intentional.

Finally, I wanted to look at how we could enhance to cabinet toe kick so that the vanity felt more like a piece of furniture. This seems like a pretty easy update, I thought we could stain a piece of oak to match the existing cabinetry and use that instead of running the flooring across the toe kick.
Alternatively, a second piece of oak could be stained and cut to look like cabinet feet, similar to the two photos on the left, or we could source some furniture feet and stain those to match the vanity similar to the photo in the bottom center.

Next Steps:
Creating some drawings for the clients to review.
Source new fixtures & hardware.
Create mood board.
Find solution for bi-fold door.
BY EMILY RADKIE