
Ensuite Planning | Part 1
Back when we first bought our home, we knew right away that we wanted to reconfigure two of the bedrooms into a larger primary suite with a walk-in closet and spacious ensuite. The intent was to complete the ensuite prior to moving in, but as the project carried on we opted to place that room on hold for a while. We’ve picked up and dropped this project a few times since then, but never got any further then tile shopping.
Part of the hang up was feeling a bit overwhelmed by the project, we’ve done a lot with our home, but building a curb-less walk-in shower feels a bit out of our realm. The cost of the project was also a factor, Matt and I both prefer to wait until we can afford to do exactly what we want as opposed to rushing a project but feeling like we’ve settled at the end. But for me, the biggest hesitation was not knowing what I wanted to do with the space and feeling afraid of not loving it at the end.
A bit of background: Maybe it’s just me, but I feel like bathroom renovations require a lot of planning and one of my biggest regrets after renovating our home is not giving our main bathroom the attention it needed during the planning phase. We knew we wanted a spectacular ensuite so that became my primary focus and as a result, the main bathroom became a bit of an after thought. Fast forward to the finish line and while our main bathroom looks much better then it did, it just feels a bit builder grade to me. So now, here we are, ready to embark on finishing our ensuite, and I’m afraid to get started because I’m disappointed in myself over how the main bathroom turned out. Can anyone else relate?
Anyway, for the past few weeks I’ve totally immersed myself back into the ensuite. I’ve spent hours reviewing the plans, our design limitations, scrolling through Pinterest, and looking at tiles. This time, rather then rushing through, I’m going to take my time in sourcing & selecting materials and I’m going to get input from other trusted experts to help ensure I’ve really thought this through (huge shout out to the ladies over at Iron River Surfaces, my sister-in-law, Kristi, over at Making it in the Mountains, and my friend Rae, another Interior Designer, for all their help so far). Finally, I’m going to use this space as an area to organize my thoughts and really think through the problem.
And so, welcome to Part 1 of my Ensuite Planning series. I don’t know how many parts of this series there will be and I don’t know how it will evolve between now and starting the project (hoping for this spring/summer). In all honestly, I feel like I’m as much along for the ride as anyone else reading this.
So here we go!
Overall Design & Design Restraints:
Ok, so here is a copy of the floor plans. As you can see, I’ve planned a shower that is 5’ long with a 32” wide platform at the entry of the shower.

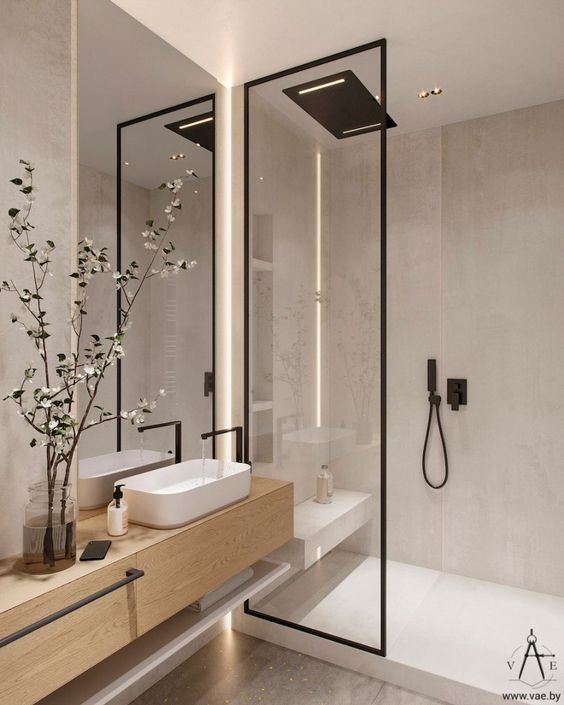
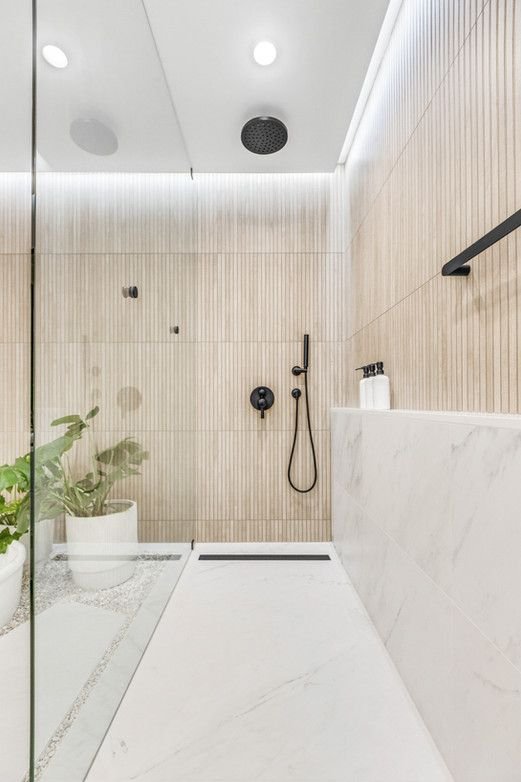
This entire area will need to be raised to allow for proper drainage in the shower. I’ve also planned for a 48” high half wall to run the full length of the entire space. Our shower head will be installed on the back wall above the linear drain and the handle will be installed within the half wall, closer to the entry of the shower. Below are two photos showing what the raised shower platform (left) and half wall (right) will look like.
We will not be installing tile on the pocket door wall as there is not enough framing within the wall to support the weight of the tiles. I’ve planned on hanging a few hooks for towels there instead.
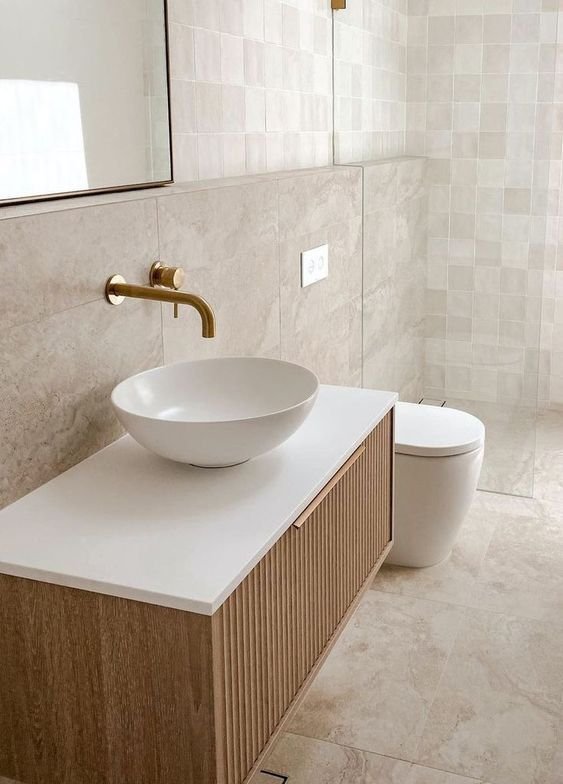
Opposite the shower wall is the vanity & toilet and I’ve planned for a wood capped half wall along here as well, similar to the image below (left). We’ve also already purchased our vanity & countertop (right). I have not decided on the faucet or cabinet hardware yet, I think that will ultimately come down to whatever pairs best with the tiles I choose.
Bathroom Floor:
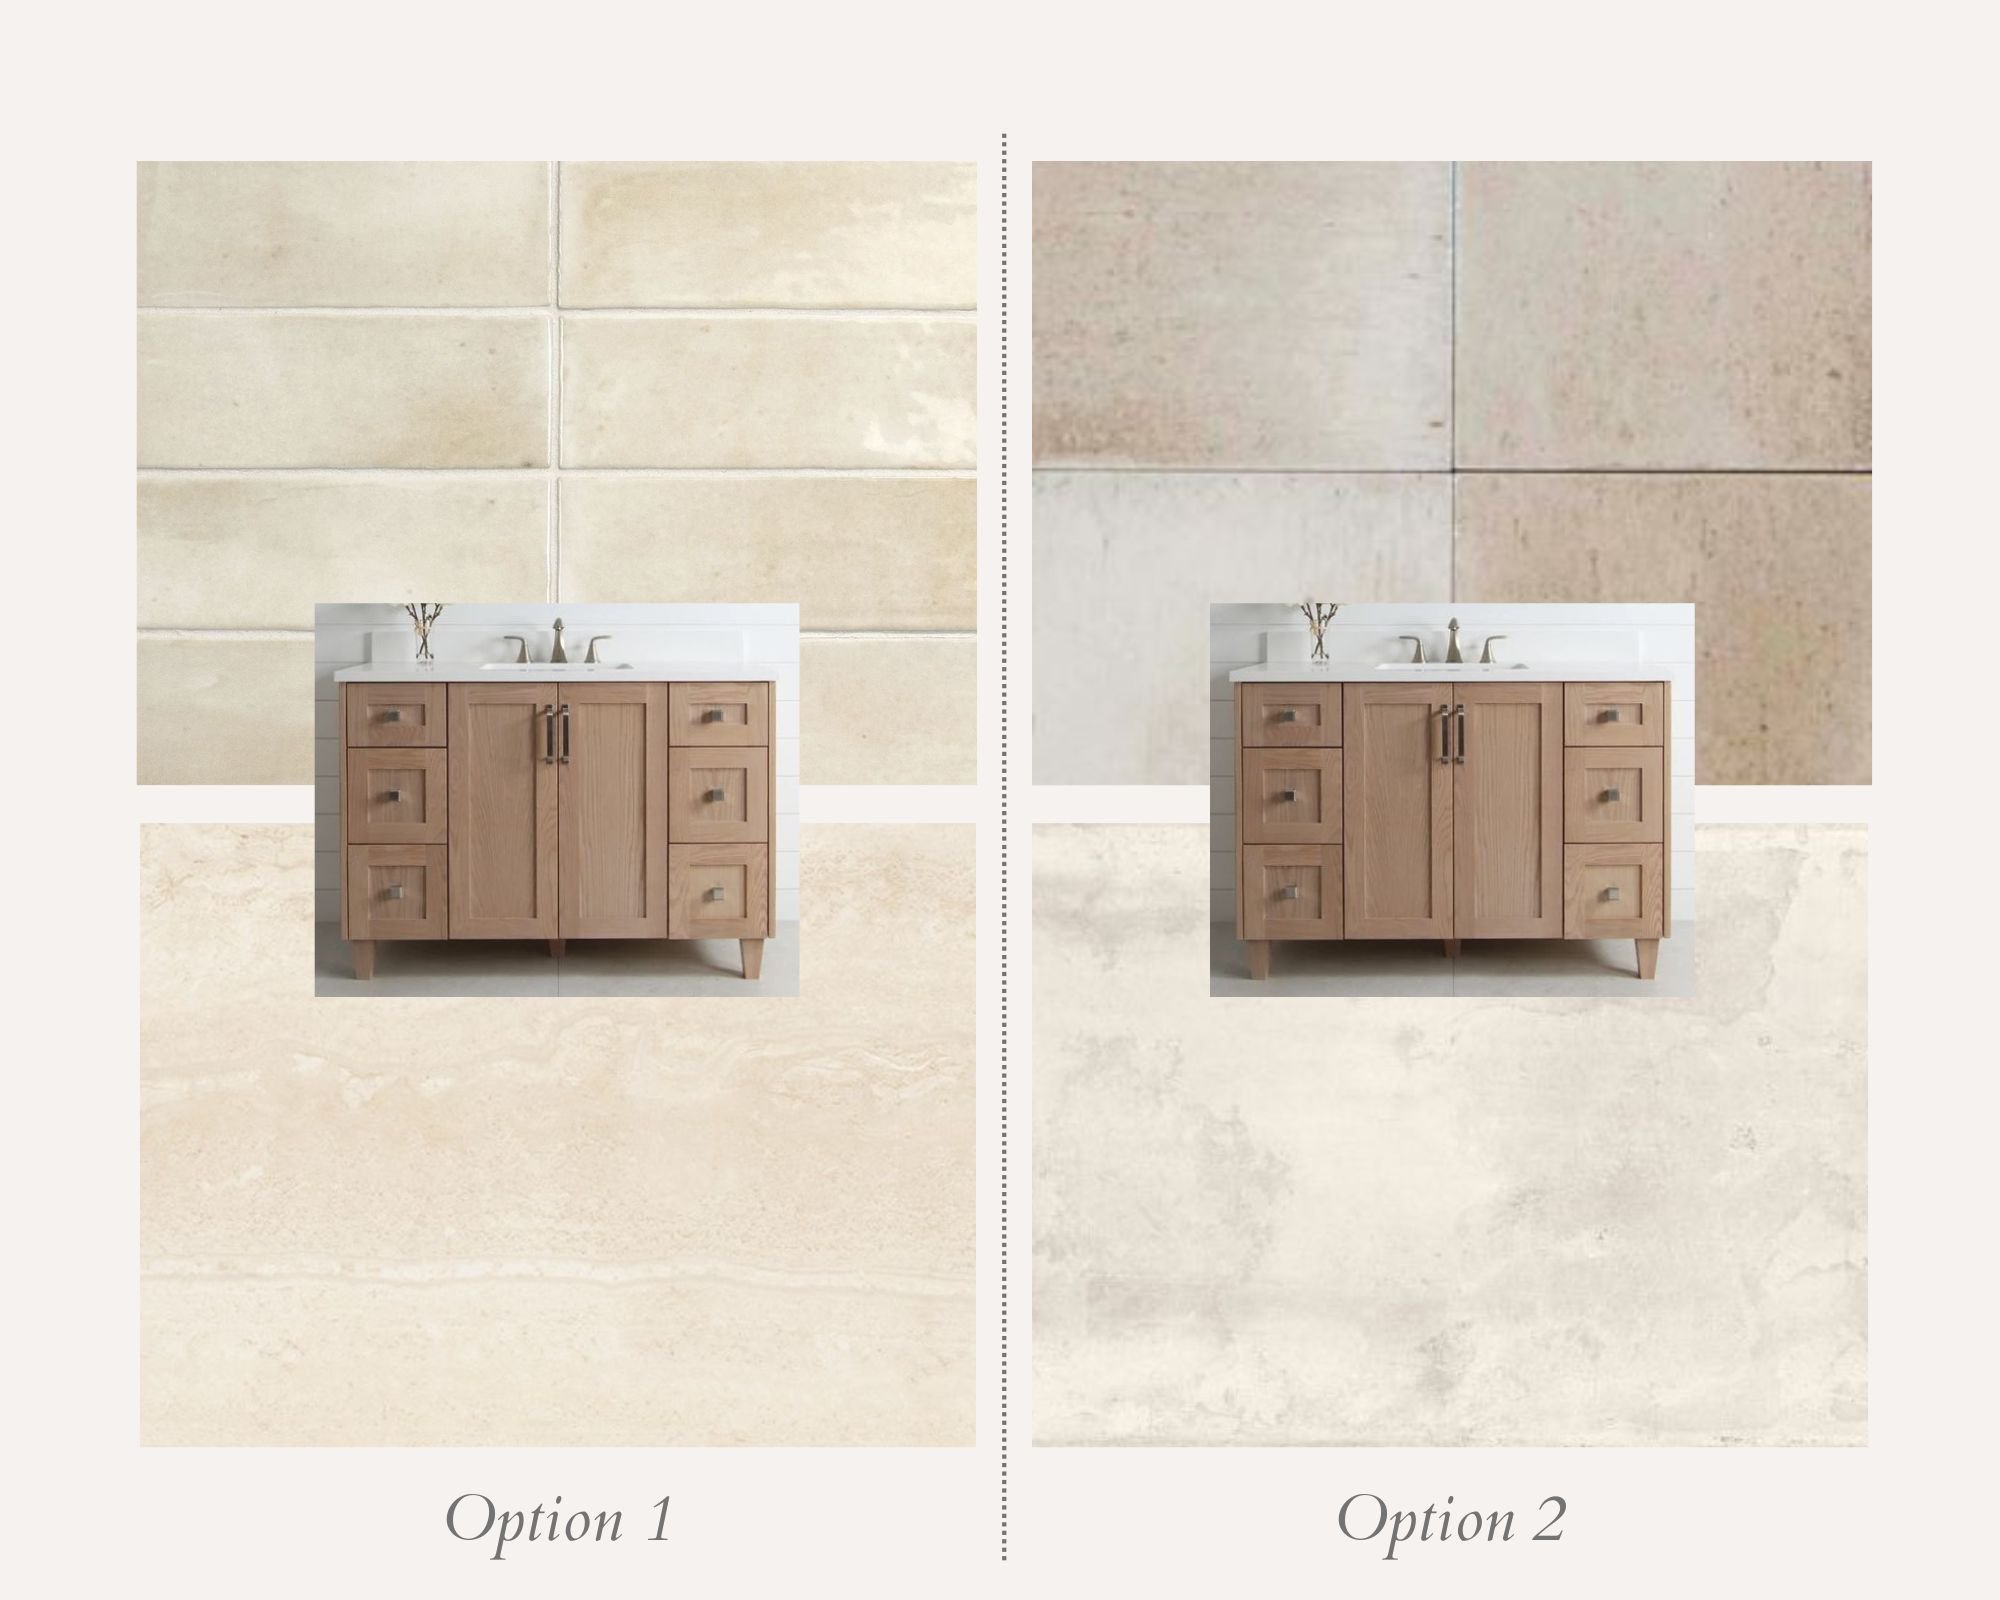
Ok, let’s start with the floor and build off of that. After hours of scrolling through Pinterest, I started leaning towards a large format natural stone for the floors, like a limestone or travertine. It’s giving some Mediterranean vibes. Not what I was initially going for but I’m going to roll with it.
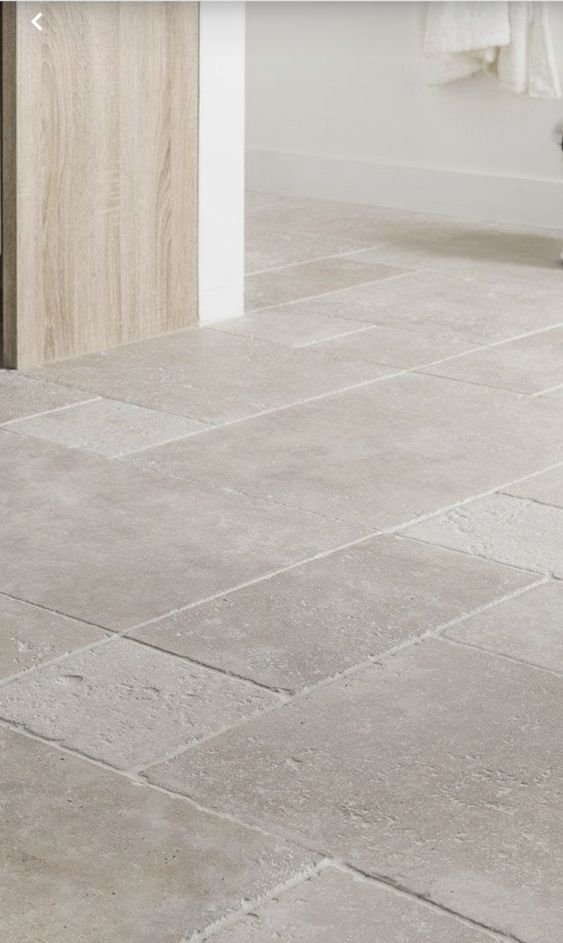
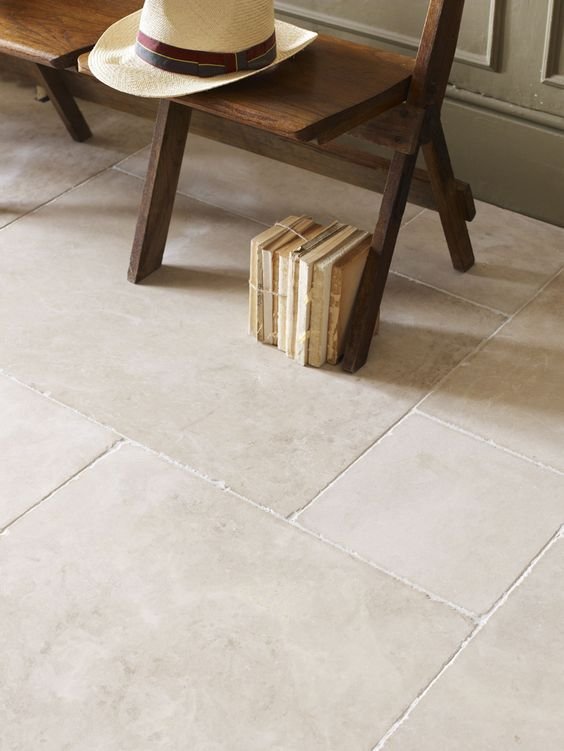
And after visiting a few stores, I think I’ve narrowed it down to one of these two options:

Shower Walls & Floor:
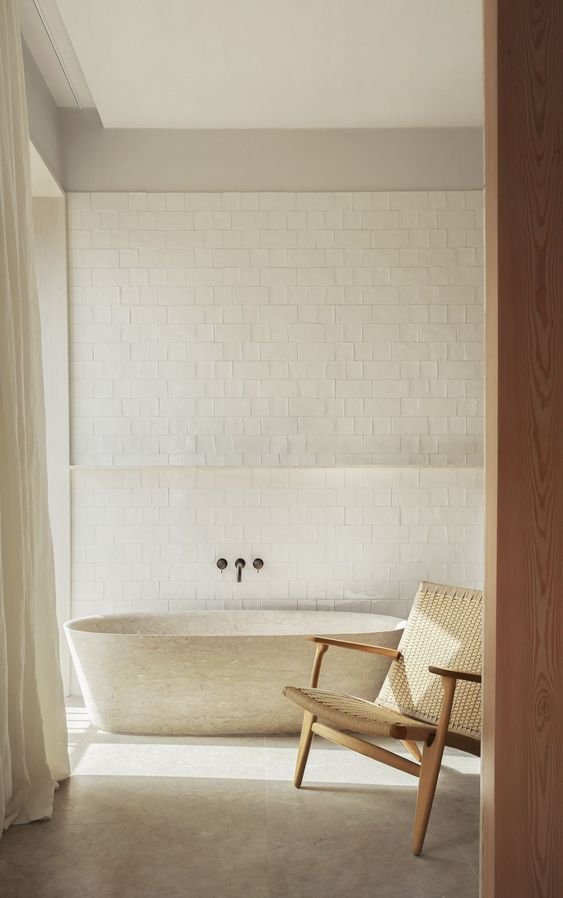
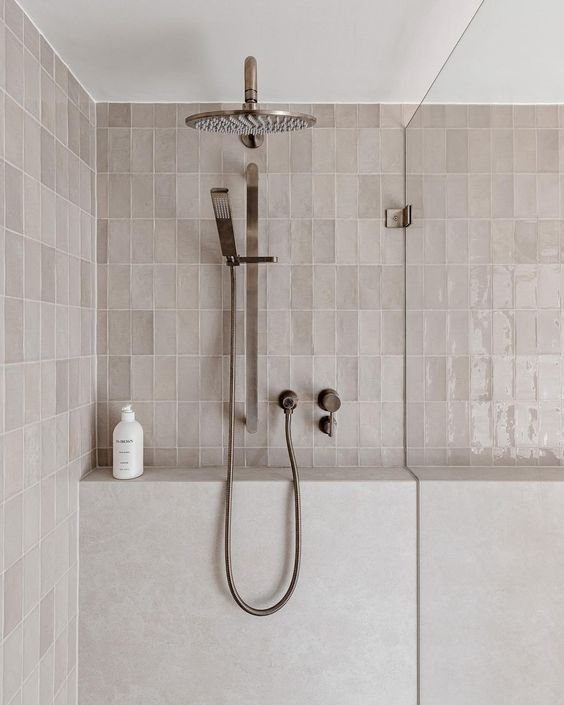
So back when we bought the house, I’d originally envisioned repeating the bathroom floor tile throughout the entire shower, similar to the first photo below, but after two years of looking at photos of bathrooms, I’m worried that’s going to leave the space feeling a bit cold, unimaginative, and a bit commercial.
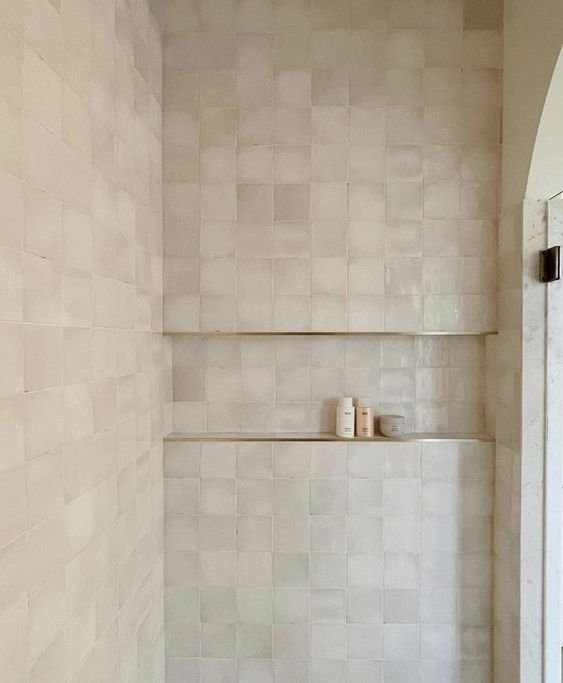
I think the solution is to add some interest through texture by bringing in a few different tiles, but keeping all of the tiles used similar in colour to tie everything together…so now the question is how do we incorporate a second tile? Here are a few of the ideas that have really stood out to me.
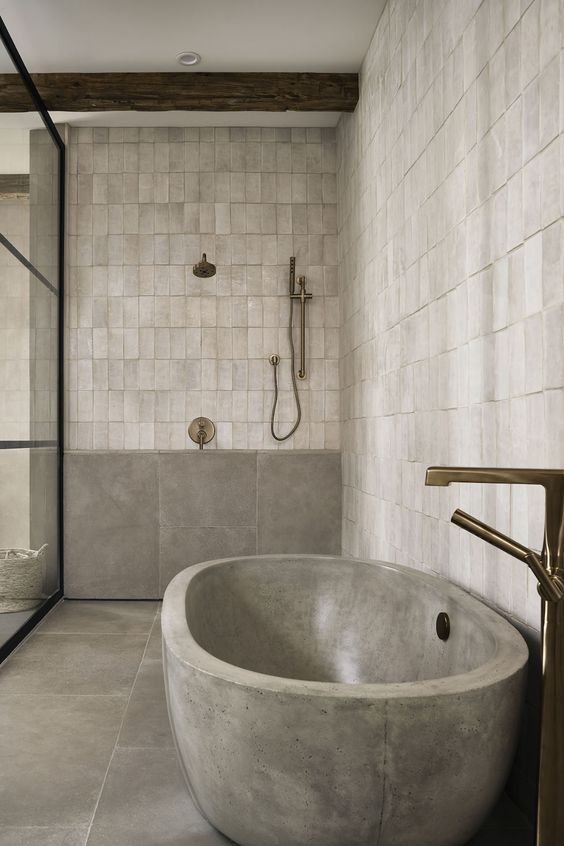
After vising a few tile shops, I’ve decided on running the floor tile up the bottom portion of the half wall. The accent tile will be applied to the top portion of the half wall and on the wall with the shower head.
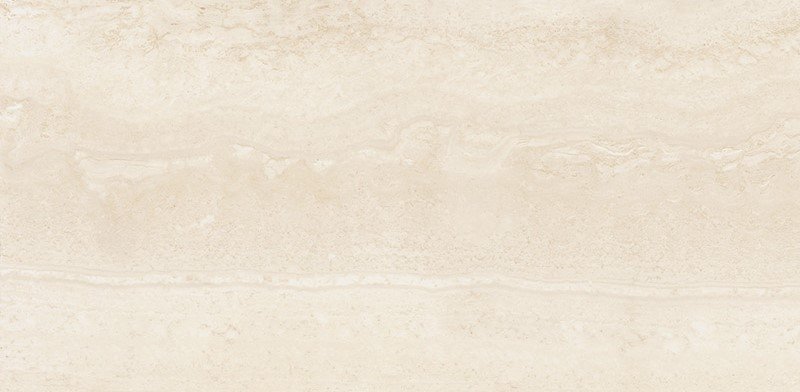
As for tiles, at the moment I’m torn between two options.
And here is everything all together with our vanity, keeping in mind that the plumbing fixtures and cabinet hardware have not been decided on yet.
Vanity Wall Ideas:
Below is the last elevation I created of the vanity wall in our ensuite, but after pricing some tile options out last year, I think we’re going to omit installing tile below the wood shelf.
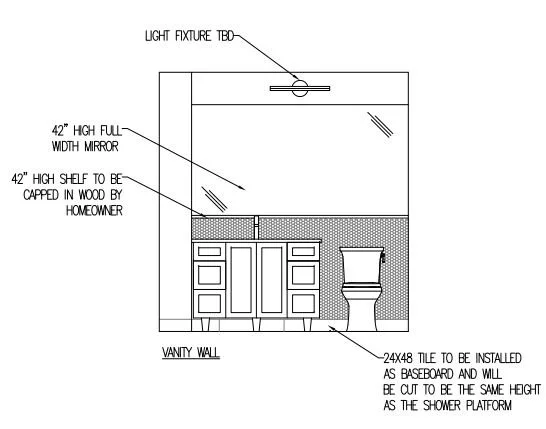
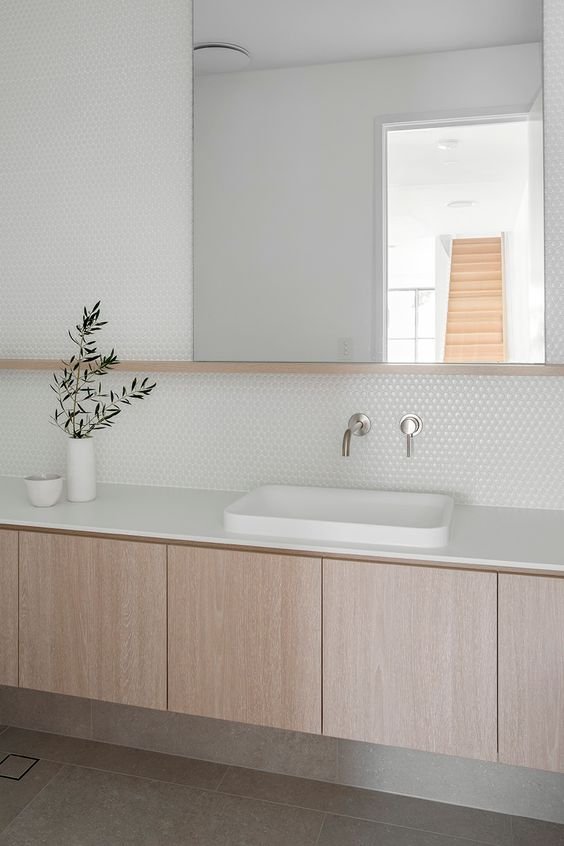
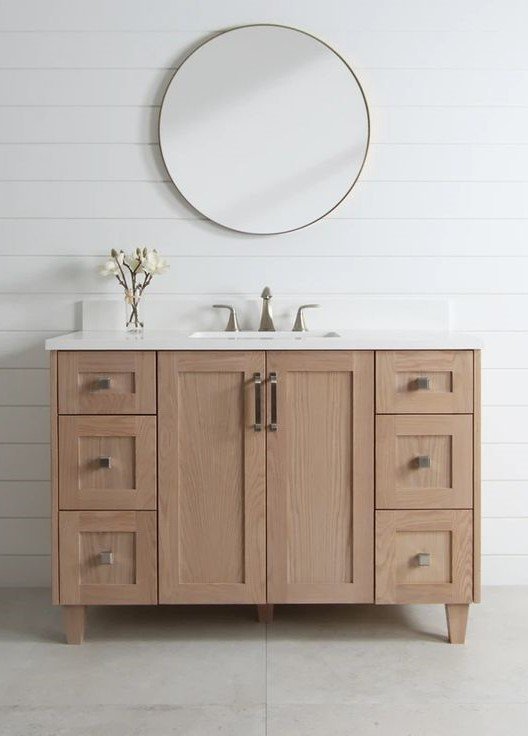
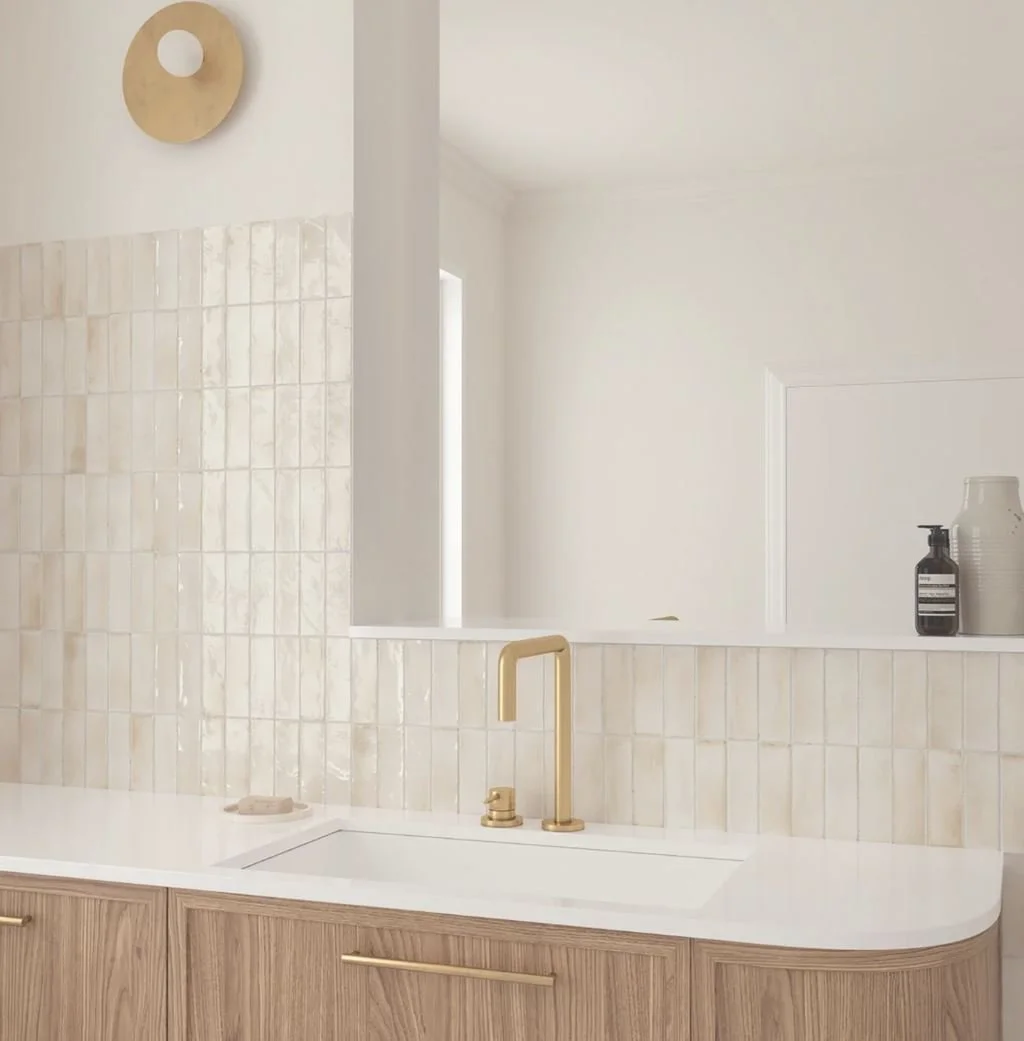
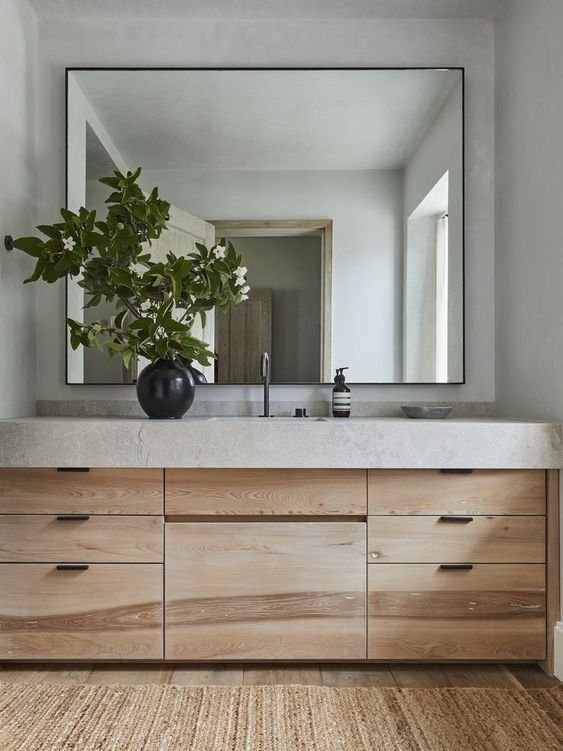
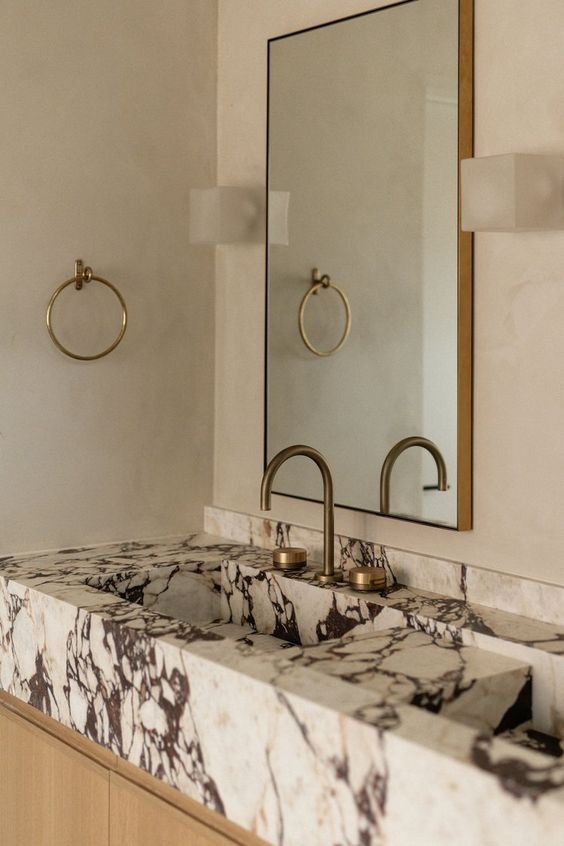
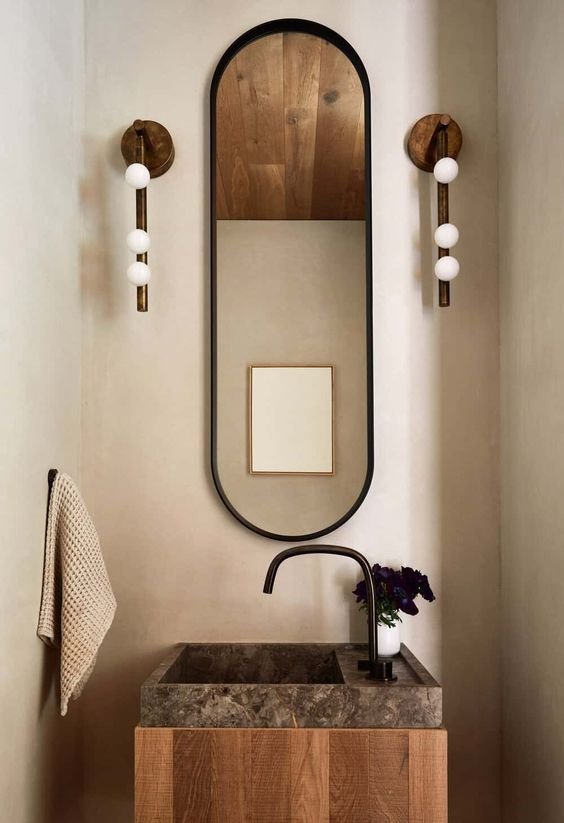
Instead we’re going to install a simple splash guard above the counter top and leave the space above it blank. I love the look of the oversized mirror and in our case I think it’s essential (otherwise there would be a lot going on above the vanity and the area around the toilet would look empty), but rather then going with a mirror that covers the entire wall, I’m going to source a framed one. I’m hoping the completed space will look similar to the images below.

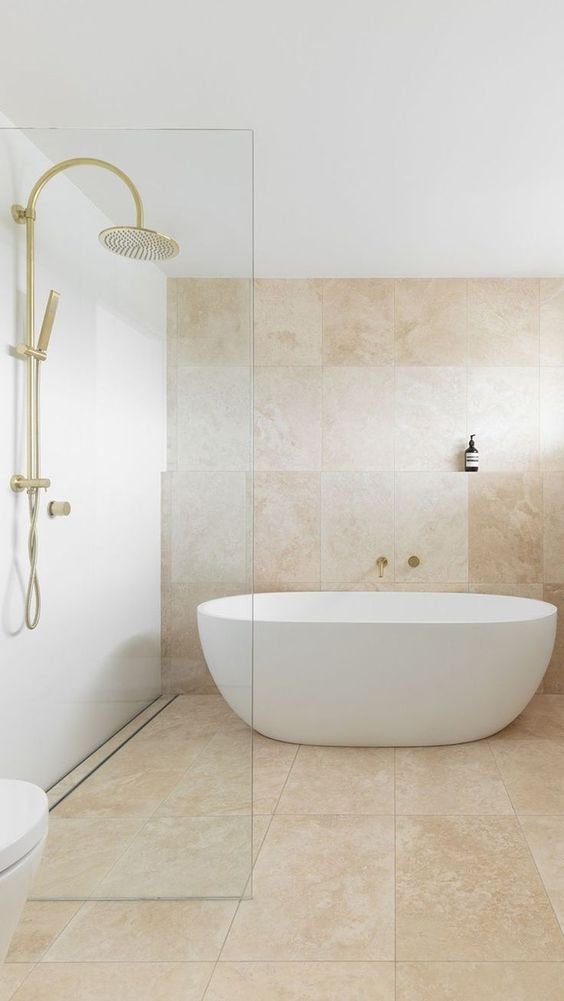
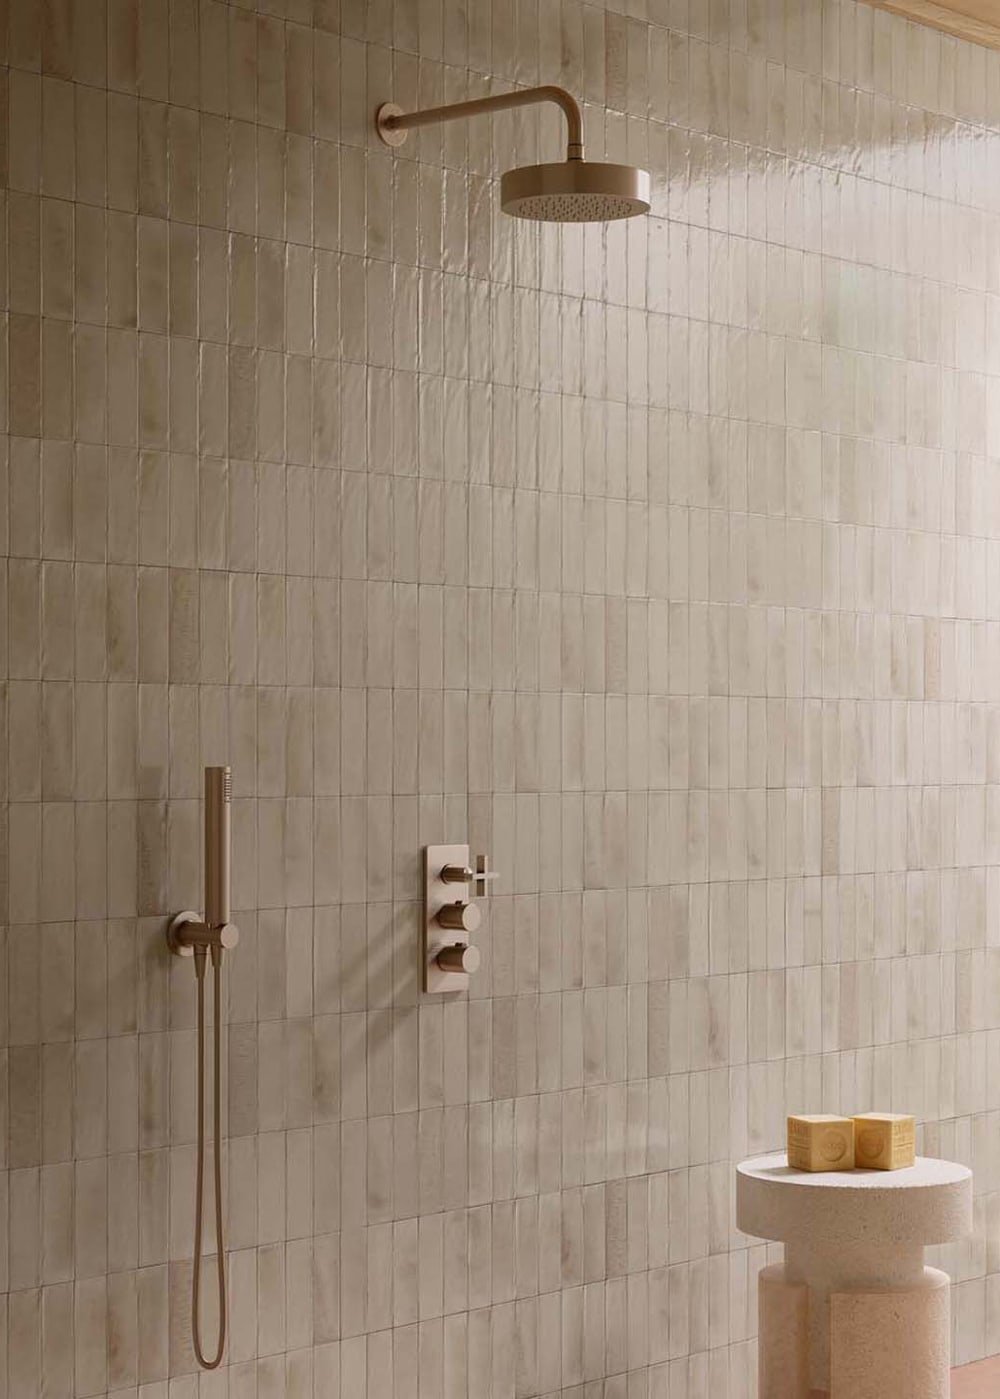
I’m also looking into lime washing the walls to create a bit of a plaster look that I think will help bring more of a Mediterranean spa feel to the space. Still waiting on some samples to come in before I decide on whether or not I want to go through with this, but here are a few lime washed spaces I’m currently loving:

Lighting & Plumbing Fixtures:
Ok so part of the reason why I’m taking a bit of a step-by-step approach this time is because I feel like I need to mix metals to make the space more interesting, but if I’m being honest, I’m afraid to do that (it’s boring but I love consistency). So when it comes to lighting and plumbing fixtures, I feel like I’m at square one and whatever I decide will depend on what metal(s) pair best with the tiles I choose.
That said, the position of our vanity light is something I’m feeling good about. I know that ideally, the lights would be installed on either side of the vanity mirror, but in our case I just don’t see how we can make that work without reducing the width of the mirror and centering it over the sink. If we were to do that, the toilet would end up sitting off by itself and I’m worried the entire vanity/toilet wall would feel a bit off-balance.
Next Steps:
Request multiple shower accent tiles to get a better sense of the variation in the tiles.
Decide on floor tile layout (size, orientation, install pattern).
Decide on wall colour (paint or lime wash)
Find a light for over the vanity.
Find a mirror for over the vanity.
Find a vanity faucet.
Find a shower faucet.
Order glass for shower wall.
Find hooks for towels.
BY EMILY RADKIE